This is my third entry for the Purse Palooza 2013 going on over at Sew Sweetness. My first entry can be found here and my second one here.
If you are looking for the All About Boys Blog Hop post it is the one below this.

The Amy Backpack from Chris W Designs, once again I was very lucky in getting this pattern for free from a girlfriend of mine Shirley at SimpleSew. I really needed a backpack pattern so I could make my daughter one for our trip and this is the first time trying to make a backpack.
Pattern: Loads of instructions and pictures, best part is that she also gives you the option to print just a few pages in a condensed instruction section at the end after the pattern pieces. Bad part, I didn't like the way the interior part of the bag was supposed to be sewed in, this gave me a hard time, so I modified the pattern.

Materials: Pretty basic, bag construction materials, I was out of fusible interfacing so I quilted batting onto the interior fabrics. I also did not use the suggested elastic for the front and side pockets, instead I used a zipper and buttons. The fabric I used is mostly Riley Blake, the fabric you see above is part of a panel it is the "closet" from the Princess Pillow Panel, that I purchased from The Intrepid Thread. The fabric for the inside and the back is "Dress Up".
Instructions: I really didn't follow any of the instructions, I think I have a problem with that, good thing I was never in the military. But the Instructions are very well written, I just wanted something different and I wanted to use what I had on hand. The basic shape of the bag is true to form.
 Modifications: The straps turned into a baby doll carrier, the pockets are not gathered with elastic, I had to change the gusset, if you don't know what that is, and I didn't, it is the material that goes around the 2 main pieces, the one that you see above with the pocket on it and the zipper. I changed all of that so I could sew my interior lining in, instead of hand sewing it to the zipper as suggested in the pattern.
 I added a little hoop to one side so I could attach my daughter's traveling pillow.
 That is a bed with a little princess, the second part from the Panel that I bought.
 Some extra photos.

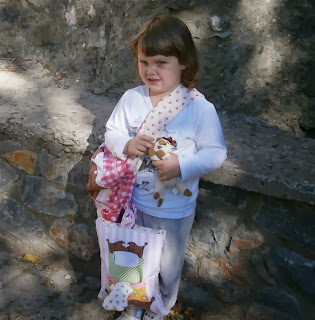 I am washing the pillow right now, because my daughter threw up all over it on the plane, no fun at all. But they are doing really good at traveling and we are very excited about continuing our trip. Leaving for New Mexico tomorrow, but not before trying out some American Barbeque today!
If you are looking for the All About Boys Blog Hop post it is the one below this.

The Amy Backpack from Chris W Designs, once again I was very lucky in getting this pattern for free from a girlfriend of mine Shirley at SimpleSew. I really needed a backpack pattern so I could make my daughter one for our trip and this is the first time trying to make a backpack.
Pattern: Loads of instructions and pictures, best part is that she also gives you the option to print just a few pages in a condensed instruction section at the end after the pattern pieces. Bad part, I didn't like the way the interior part of the bag was supposed to be sewed in, this gave me a hard time, so I modified the pattern.

Materials: Pretty basic, bag construction materials, I was out of fusible interfacing so I quilted batting onto the interior fabrics. I also did not use the suggested elastic for the front and side pockets, instead I used a zipper and buttons. The fabric I used is mostly Riley Blake, the fabric you see above is part of a panel it is the "closet" from the Princess Pillow Panel, that I purchased from The Intrepid Thread. The fabric for the inside and the back is "Dress Up".
 |
| changed the 2 straps for an over the body doll carrier. |