


I joined the Secret Tote Bag Swap on August 30th, but it took me a while to find something that I liked, especially a pattern that I wouldn't have to buy. And I found the perfect bag on Sew Sweetness (not looking for any bonus points or anything :), the Fylerion Bag, not only is it a FREE pattern and tutorial but Sara has also made a Video Tutorial, I am such a visual learner and this was a huge help for me.
 My secret partner requested: I would like a quilted tote bag with some type of closure at top and an
inside zippered pocket. Any other extra pockets are great but not
imperative. I really don't like anything too big and I prefer shorter
handles since I rarely use shoulder bags.
My secret partner requested: I would like a quilted tote bag with some type of closure at top and an
inside zippered pocket. Any other extra pockets are great but not
imperative. I really don't like anything too big and I prefer shorter
handles since I rarely use shoulder bags.
The Fylerion Bag Pattern: You only need to print 4 pages for the pattern, this is nice I so don't like it when I have to print a massive amount of pages. Each pattern piece is labeled with what fabrics and interfacings you need to have cut. The tutorial and directions can also be printed from the PDF download or you can just read them on-line on Sara's blog. The video can also be found there and I watched this first and then read the directions and printed the pattern pieces.
The Supplies: Are also listed both on the PDF download and on her blog. Now if you are like me and live in Europe where it is hard to find the beloved American interfacing company Pellon, well Sara has made the conversion to the more readily available Vilene here. Instead of using the Pellon SF-101, I used Vilene G-700 (which I love by the way) and I didn't have fusible Thermolam and since I was going to be quilting it I used Vilene Sew-In Volume Fleece 272 Thermolam, BUT only on the exterior pieces of the bag and not the interior, I did use it on both pieces of the paneled sides.
The Instructions: Can I just say VIDEO! The written instructions are also nice, I love the way she labels each step first by numbers (there are only 8 steps, easy right) and then alphabetically, it makes it so easy to follow along. It was also very easy to sew and put together, I did break a needle when going over the 4 layers of thermolam and I am so glad that I only had it on my panel sides and not for the whole entire bag, I think it would have made the bag to "thick".
The Inside: Is equipped with 2 pockets, but since my partner requested a zipper I made one pocket into a zipper pocket.

 A few Modifications: I didn't know how big the bag was going to be, it looked a little small to me, so I added 2 inches in the height and width. This made it hard to know what size I would need for the side panels and so at first I didn't angle cut them like the pattern requested but after sewing it together I ripped it apart and trimmed as suggested, it looked and fit together much better :)
I had major issues with the magnetic closure, first I lost the ones I bought, couldn't find them anywhere so I went back to the store I bought them at and she was all out, this was on Friday the 5th when I was supposed to mail my package. The store owner told me she would have them in on Monday, in typical Greek fashion when I went on Monday she said she would have them on Tuesday, when I went on Tuesday she said she would have then the next day, and I am sure she would have continued along. Well on Tuesday I was like where are the ones I bought? I looked everywhere, well I could just use a button, so I look in my button bag and lo and behold there are my magnetic closures.
I put them in and sew up the bag, only a few days late, but then when I tried to pull the closure open it was pulling the fabric and I was afraid it would rip.
The next day I ripped into the bag to change out the magnet with one from my fridge, lol, don't suggest that it doesn't work to well.
Next plan a sew in button snap, that worked well.
Since my partner didn't really want over the shoulder I made the strap the way Sara suggested then cut it in half and sewed it in near the flap. To make a hand straps.
I also added a Large Swivel Snap Hook to the side of the bag to hold a wristlet bag that I made. I appliqued the accent pattern piece for the front panel and then I used a decorative stitch to adhere it on, instead of folding it underneath and sewing.
 The Fabric:
Now the reason I did a "double" accent piece was because when I made my quilted front panel I put it on my table to cut and next to it I had been auditioning some fabric for the charity bee I belong in and the purple Ty Pennington fabric looked so good next to the Art Gallery fabrics I had been using, so I added a second accent piece.
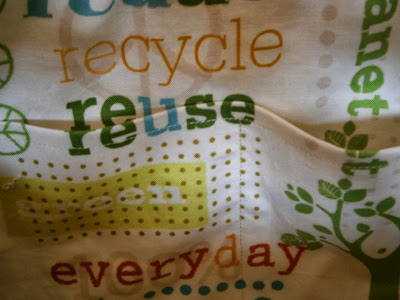
 AGF Nature and Floral Elements along with Naturella plus Robert Kaufman Essex Yarn Dyed Linen in Flax, Aurifil 2312 looks great with the Linen Flax, this is 1 of the threads in Pat Bravo's bold beauty box's and I used Aurifil Variegated 4653 to "quilt" the front of the bag.
The back is a foundation Paper piece pattern called "Feathers" by Alison Glass, I turned 2 feathers side ways and "added" a branch to make it look like leaves, at least I hope so, this tote swaps theme was "Nature".

Linking to Sew Sweetness Purse Palooza 2013
and Linking to Such a Sew and Sew: A Stitch in Time Linky Party.

this is also on my list for October A Lovely Year of Finishes list.

The Fylerion Bag Pattern: You only need to print 4 pages for the pattern, this is nice I so don't like it when I have to print a massive amount of pages. Each pattern piece is labeled with what fabrics and interfacings you need to have cut. The tutorial and directions can also be printed from the PDF download or you can just read them on-line on Sara's blog. The video can also be found there and I watched this first and then read the directions and printed the pattern pieces.
 |
| The Back |
The Supplies: Are also listed both on the PDF download and on her blog. Now if you are like me and live in Europe where it is hard to find the beloved American interfacing company Pellon, well Sara has made the conversion to the more readily available Vilene here. Instead of using the Pellon SF-101, I used Vilene G-700 (which I love by the way) and I didn't have fusible Thermolam and since I was going to be quilting it I used Vilene Sew-In Volume Fleece 272 Thermolam, BUT only on the exterior pieces of the bag and not the interior, I did use it on both pieces of the paneled sides.
The Instructions: Can I just say VIDEO! The written instructions are also nice, I love the way she labels each step first by numbers (there are only 8 steps, easy right) and then alphabetically, it makes it so easy to follow along. It was also very easy to sew and put together, I did break a needle when going over the 4 layers of thermolam and I am so glad that I only had it on my panel sides and not for the whole entire bag, I think it would have made the bag to "thick".
The Inside: Is equipped with 2 pockets, but since my partner requested a zipper I made one pocket into a zipper pocket.


I had major issues with the magnetic closure, first I lost the ones I bought, couldn't find them anywhere so I went back to the store I bought them at and she was all out, this was on Friday the 5th when I was supposed to mail my package. The store owner told me she would have them in on Monday, in typical Greek fashion when I went on Monday she said she would have them on Tuesday, when I went on Tuesday she said she would have then the next day, and I am sure she would have continued along. Well on Tuesday I was like where are the ones I bought? I looked everywhere, well I could just use a button, so I look in my button bag and lo and behold there are my magnetic closures.
I put them in and sew up the bag, only a few days late, but then when I tried to pull the closure open it was pulling the fabric and I was afraid it would rip.
The next day I ripped into the bag to change out the magnet with one from my fridge, lol, don't suggest that it doesn't work to well.
Next plan a sew in button snap, that worked well.
Since my partner didn't really want over the shoulder I made the strap the way Sara suggested then cut it in half and sewed it in near the flap. To make a hand straps.
I also added a Large Swivel Snap Hook to the side of the bag to hold a wristlet bag that I made. I appliqued the accent pattern piece for the front panel and then I used a decorative stitch to adhere it on, instead of folding it underneath and sewing.

Now the reason I did a "double" accent piece was because when I made my quilted front panel I put it on my table to cut and next to it I had been auditioning some fabric for the charity bee I belong in and the purple Ty Pennington fabric looked so good next to the Art Gallery fabrics I had been using, so I added a second accent piece.

The back is a foundation Paper piece pattern called "Feathers" by Alison Glass, I turned 2 feathers side ways and "added" a branch to make it look like leaves, at least I hope so, this tote swaps theme was "Nature".

 |
| Second time doing some FMQ |
and Linking to Such a Sew and Sew: A Stitch in Time Linky Party.
Mara your bag is beautiful! I am sure your bag swap partner will love it.
ReplyDeleteVery cool! You have one lucky swap partner!!
ReplyDeletevery nice bag! And, I love the view you have! :)
ReplyDeletethis is gorgeous :-) You are quite an expert at adapting a pattern - making it work for you. I am clueless but hopefully will eventually learn! Am sure your swap partner will love this.
ReplyDeleteYour bag is great! I love Sara's bags but I don't believe i have seen this one! I'm glad to know I'm not the only one with who had struggles, but in the end we triumphed!
ReplyDeleteIt sounds like your bag making was quite an adventure - especially that magnetic clasp hiding! It has turned beautifully. Your partner is going to be delighted with it :)
ReplyDelete