First Part of Crib Organizer with Removable Fabric Baskets and a Diaper Clutch Tutorial
This is super easy to make, and really easy with the panel, but you can use any fabric you want to.
Have you ever done a French Seam, this is what we will be doing with the First Part of the Panel, here are 2 good French Seam tutorials, here and here.
Cut the Panel.
I did not cut the left side selvedge off, do you see the 4 green lines on the left side of the panel. I folded the panel in half lengthwise (along the 44-45", just halfway) I matched those up and then cut down the middle of the panel, for the first cut, it was about 22 1/2 ". You now should have a piece of fabric that is 22 1/2 " by 36"
Take that piece and fold it in half (the 1 yard repeat) with the right side of the fabric facing you, match up the boxes on each side, you may need to trim the top to squares things up. It should now be about 22 1/2" by 18".
Now it is time to do the French Seam, sew up each side with wrong sides of fabric facing each other and the right side facing you and the bottom of the sewing machine, if you leave the selvage on then stitch at 3/8".
The most important thing to remember about French Seams is the Pressing, aka, Ironing, YOU MUST IRON THE SEAM TOGETHER DO NOT OPEN THE SEAM! Press to one side, it does not matter which side. Ironing is very important and makes a very nice French Seam.
Now cut a little bit at the corner so it turns better and turn your panel wrong sides out and right sides together. Once again Iron and press so that it lays nice and flat. Sew a 5/8" Seam.
Turn back out and Press, now to finish your top.
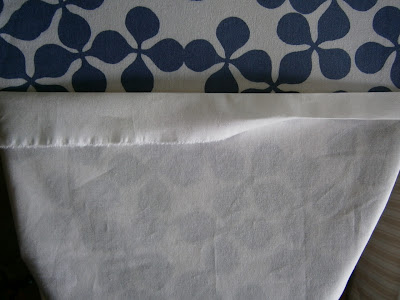
Once again the Iron comes out, or maybe it never got put away. I fold my edge in 1/4 of an inch and then again at 1/2". Then top stitch the seam down.
And tada the first part is done, we will had the straps and buttons in a little bit.
This is all Part of The Crib Organizer that I made for a friend of mine who will be having a baby in September, I have entered it into the Make It Right Challenge with Art Gallery Fabrics.
If you would like to pin an image please Pin this one from the contest.
This is super easy to make, and really easy with the panel, but you can use any fabric you want to.
Have you ever done a French Seam, this is what we will be doing with the First Part of the Panel, here are 2 good French Seam tutorials, here and here.
Cut the Panel.
 |
| You will be using the left piece for this part of the crib organizer. |
Take that piece and fold it in half (the 1 yard repeat) with the right side of the fabric facing you, match up the boxes on each side, you may need to trim the top to squares things up. It should now be about 22 1/2" by 18".
Now it is time to do the French Seam, sew up each side with wrong sides of fabric facing each other and the right side facing you and the bottom of the sewing machine, if you leave the selvage on then stitch at 3/8".
 |
| For the first row of stitching the right sides of fabric face out. |
The most important thing to remember about French Seams is the Pressing, aka, Ironing, YOU MUST IRON THE SEAM TOGETHER DO NOT OPEN THE SEAM! Press to one side, it does not matter which side. Ironing is very important and makes a very nice French Seam.
Now cut a little bit at the corner so it turns better and turn your panel wrong sides out and right sides together. Once again Iron and press so that it lays nice and flat. Sew a 5/8" Seam.
Turn back out and Press, now to finish your top.
Once again the Iron comes out, or maybe it never got put away. I fold my edge in 1/4 of an inch and then again at 1/2". Then top stitch the seam down.
And tada the first part is done, we will had the straps and buttons in a little bit.
This is all Part of The Crib Organizer that I made for a friend of mine who will be having a baby in September, I have entered it into the Make It Right Challenge with Art Gallery Fabrics.
If you would like to pin an image please Pin this one from the contest.


No comments:
Post a Comment